Today, with the help of my mother-in-law (a quilter), I made a pillow case. We picked three different fabrics (I decided to make it for my husband), and she did the cutting (I was a bit distracted because the little one was getting hungry at that time). The technique for this pillow included a "sausage roll" for the main fabric on the inside. It was a rather intriguing technique.
I think one of the most important things that I learned was how to use a guide for the edge of the fabric (so I can sew the lines straight). She pulled out the part and I realized that I have that part for my own sewing machine. And I found it really helpful to really keep me sewing on a straight line. I will definitely be using that at home for a while until I get more practice.
I think this pattern will be one that I try out again as it makes a rather nice-looking pillowcase. I'll post a picture a little later.
Edited Jan. 6 to add a site that has a video tutorial for this very pillowcase pattern!

Tuesday, December 20, 2011
Friday, December 9, 2011
First Napkin
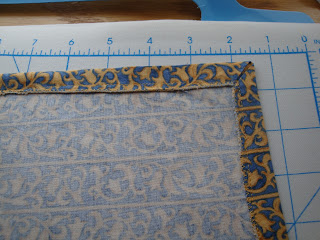
I started the first of the main projects in Stitch by Stitch today: a napkin. I'll be making a total of 4, but for today I finished just the first one. The first step was to cut out a 19" square. I thought that I had gotten it, but then I decided to trim an edge that was a bit unraveled and in doing so realized that I must have gotten off somewhere because the edges weren't completely straight. So in trying to get it straight and then making sure it was still a square, I got down to an 18" square. I'm glad it was a napkin and not something that was super dependent on size. I'll just have to remember to make the other three napkins 18" also.
Then the instructions were to finish off the cut edges by doing a zig zag stitch right along the edge (over the edge actually: overcast edge). This was quite fun and I really enjoyed doing it. I think I'll have to make sure to remember this technique for future projects. I might even just use this type of edge for the receiving blankets to burp cloths project instead of hemming the cut edge.

Then the technique to make mitered corners was simply to fold the corner down and then fold the sides to meet the points (there are other corner techniques discussed which I shall try on the leftover material for practice when I finish the other three napkins). This was a bit fiddly as the edges didn't want to stay completely straight while I was pressing. I don't know if pinning would be helpful but I will give that a try for the next napkins.
After all the folding and pressing, it was time to stitch again. The instructions were to topstitch beside the overcast edge.
Here's where I definitely need more practice. First, I need to make sure to keep a straight line. Second, I got too close to the edge a few times and shifted back over. When viewing the front side of the napkin, these jagged lines really show up. Oops. I also need to make sure to finish evenly with where I started so that everything lines up.

The good news is that I have a functioning napkin, so I'm going to focus on that and use the other three napkins to make these techniques even better.

Then the instructions were to finish off the cut edges by doing a zig zag stitch right along the edge (over the edge actually: overcast edge). This was quite fun and I really enjoyed doing it. I think I'll have to make sure to remember this technique for future projects. I might even just use this type of edge for the receiving blankets to burp cloths project instead of hemming the cut edge.

Then the technique to make mitered corners was simply to fold the corner down and then fold the sides to meet the points (there are other corner techniques discussed which I shall try on the leftover material for practice when I finish the other three napkins). This was a bit fiddly as the edges didn't want to stay completely straight while I was pressing. I don't know if pinning would be helpful but I will give that a try for the next napkins.
After all the folding and pressing, it was time to stitch again. The instructions were to topstitch beside the overcast edge.

Here's where I definitely need more practice. First, I need to make sure to keep a straight line. Second, I got too close to the edge a few times and shifted back over. When viewing the front side of the napkin, these jagged lines really show up. Oops. I also need to make sure to finish evenly with where I started so that everything lines up.

The good news is that I have a functioning napkin, so I'm going to focus on that and use the other three napkins to make these techniques even better.

Wednesday, December 7, 2011
A Bib and Two Pacifier Clips
So instead of cutting the pieces for the napkins, I decided to try doing another pacifier clip. This time I used some material with cats on it. I cut out a piece 4" by 11" and folded under the short sides (last time I used pinking shears on those sides but I wasn't completely happy with the look). Then I folded it in half length-wise, unfolded and folded the two edged into the middle and then folded again, to get a 1" long strip (pressing each fold). I then sewed down the open long side, around the top, around the other side, and enclosed the little strap to put on the pacifier in the last short side. Although I had folded and pressed carefully, it did get a bit out of line while sewing. And when I added the suspender clip part to the other end, it seemed to also not be quite as neat as I was hoping (although better than the first one). But it was an improvement in some ways from my first attempt.

With some of the small scrap material, I decided to applique another bib. Since it was cat material, I decided to do a cat's head. I got the webbing on just fine this time, cutting out the shape after attaching it to the material. Got it positioned on the bib and started to sew around it. I think I did a pretty good job around the curve (my first curved edge!), but the cat ears gave me a lot of trouble. For the first ear, I overshot going one way and when I went back down the other side, it was very clear at the top that it just didn't look right. For the second point, I tried doing more maneuvering to get the needle in just the right position. I think I did better at the point itself, but I did have two stitches that were off line by quite a bit so those really stand out. Alas. But it's functional and doesn't look too terrible, so that is good. One more bib to go. I'm not sure yet what I will put on it.

Finally I decided that I wanted to try a pacifier clip once more. This time I actually sewed down the hem on the short sides before folding into the strap shape. I think that helped to stabilize the material a lot more (and perhaps I can use a longer length stitch in the future, almost just basting them to keep it steady). Although it still has a few kinks, it's one that I'm much happier with so I think that except for a few little tweaks here and there, I have the main process of making those pacifier clips down. I have other kinds of cat material, some dog material, and other outer space related material that I plan to use to make more clips, so I have plenty to work with.

Continuous Bias Tape
The last of the mini projects in the Stitch by Stitch book is to make continuous bias tape. The second main project uses the bias tape, so I decided to just make this bias tape to use for that project (which the book doesn't actually suggest, but the measurements are the same for what is needed for the project). So I started off by folding the diagonal and cutting along it. After that, the pieces were positioned together and the seam was sewn. I was a little confused by how to place the pieces, but once I figured out that I was looking at the picture wrong, I got them positioned. Sewing the seam went well and I pressed it open afterwards.

So far so good. Next up was drawing lines that were three inches apart. That went pretty well also. So far, making this bias tape is easy, I thought.

Then it came time to line up the lines (staggered) to shape it into a tube that would then be cut upon the lines for one continuous piece. Although I understood completely the idea behind how to line them up, in execution, I'm not sure that I got it. The instructions said that the pin along the line from one side would line up with the line on the other side and that wasn't happening. I watched a YouTube video about making continuous bias tape and after that, I placed my pins and sewed my seam. Pressing it open was a little more difficult. My ironing board was quite wide. I think I'll have to get a smaller ironing board or one of those arm things for ironing sleeves.

So then it was time to cut the bias tape. When I got to the seam from the tube, I noticed that the lines seemed off just a little (I had to go off to the side instead of completely straight to continue following the lines). And sure enough, when I looked at my finished bias tape, I have places that are not straight but that shift to the side.

Hmmm...I think I need to go watch some more videos to figure out how to really get things lined up so that my bias tape will be straight. I'm not sure that what I have now is usable for the project, so I'll have to figure that out too. I guess I'll have to get some more material and make another attempt at continuous bias tape.
But I have one other project to do before the one that uses the bias tape, so next up will be a set of napkins. I have the material in the washing machine right now (prewashing as suggested) and hope to at least get the pieces cut today, but we'll see what the little boy's schedule is like. The whole bias tape process was quite broken up as I stopped to feed the boy, and play with him, and rock him to sleep for his nap, all of which I was quite happy to put the sewing project aside for.

Edited to add: I've watched some videos. My book does not have me cut the square; it keeps the leftover bit from the fat quarter. All of the videos I watched used a square (so there's a weird piece on one end). I'm not sure how much of a difference that makes, but next time I will make it a square first to see if it helps. I also will be extra careful in lining up the lines for the tube. I'm actually itching to do this now, but I don't think I have the material for it, alas. Will have to make a trip to the store but probably not until tomorrow.
Tuesday, December 6, 2011
Applique Bib
The next mini project in the Stitch by Stitch book (I skipped the free-sewing picture) is the Machine Applique Tee. I decided instead of doing a t-shirt (or a onesie as I had thought about doing), I would do a bib because I know my son will be needing to use bibs soon.
So I bought a package of three white bibs and decided to use the spaceship material that I had used for the pacifier clip. The image in the book was a heart but instead of doing that, I used the first letter of my son's name: L. I figured that although I should practice doing curves, the straight lines of the L would be a good first project and then I'll try something else for the other two bibs.
So I started following the instructions. Well, almost. I got a step ahead of myself and cut out the letter before I had adhered it to the fusible webbing. It seems that the suggestion (both in the book as well as the webbing instructions) is to place the material on the webbing first and then cut. I not only cut the material, I also cut the webbing before joining them. Lining then up then was a bit of a chore but I got it. Next time, however, I will put them together and then cut.
Then I made another error. Apparently the webbing I got is sticky and doesn't need to be ironed onto the material. In the book it says to iron it to get it to stick. Well, my webbing apparently didn't have the protective paper on the side that is supposed to go onto the project (the bib), so when I ironed the material and webbing guess what it did? It stuck to my ironing board! Oops! Okay, big lesson learned there. I was able to get it off my ironing board with only a little residue sticking to it (will be something to always remind myself to read through the instructions of the product I'm using before moving forward) and it it onto the bib. Whew! First big step complete.
The next step was to add a stabilizer to the back (since the bib is a knit material). Something else I learned. Apparently the stabilizer that I got was not one that adhered to the material. I did try to iron it and it stayed long enough for me to get it under the sewing machine and I think it did its job, but I'll make sure to be more careful about what I buy in the future. It was just all a bit confusing in the store as there were so many different types and I wasn't sure which one to get.
So finally it was time to work with the machine. I had used a practice piece of fabric to get the stitch length and width right for my zigzag stitch to make it into a satin stitch. I had to try a couple of different settings and even played with the tension knob a bit. It still didn't look quite perfect but it was looking okay so I decided to go ahead and do the sewing on the bib itself.
The book said to make a few stitches beyond the edge before turning, so that's what I did. And here's where I learned another lesson. It makes a big difference if the needle is on the right or left when you start sewing again as to where the zigzag gets placed. At the top right of the L, I started the needle on the wrong size and the stitches were way off from the material. Oops. I only stitched one zig and one zag before noticing so I cut the thread, repositioned, and started again, ripping out the two wrong stitches at the end. I'm sure there was a more polished way of fixing that mistake but what I did seems to have worked.
I finally got back around to where I started. All finished. I'm not entirely happy with the corners as you can clearly see the stitches beneath. I'm not sure if I need to work on the stitch settings to fix this or perhaps not stitch so far over the edge in the future. I'll have to experiment to figure it out. But for now, my son now has a new bib!

Sunday, December 4, 2011
Sampler
I haven't had time to sit down at the sewing machine for the past few days (a three-month-old baby definitely takes up a good chunk of my time, but I'm more than happy to give it to him), but I've been reading Stitch by Stitch: Learning to Sew One Project at a Time by Deborah Moebes.
The first project (a mini project) is a sampler: basically running your machine through the various stitch options to get a feel for them and also to see what the machine can do. So the other day, I had bought some plan maroon material and white thread (go Aggies!) for this sampler. And today my husband took charge of the baby so I could have some time to work on this. And it's a good thing that he did because it actually took a couple of hours.
I fold the fabric in half and ended up with a piece that was 10.5" by 8.5". I started out with just the plain stitch, varying the stitch length twice down the line to see what that looked like. I then used the zig zag option. One thing that I was trying to focus on was being able to guide the material so that it would stitch in a straight line. So I tried to use the previous stitched line as a guide, keeping it inline with the presser foot as I made the new line of stitches. I did have a few times where I went off a little, but I think I was able to keep the lines fairly straight. I had the speed on the middle setting.
I went through a number of stitch patterns that I could do with the presser foot that was on the machine. But to do some of the more decorative ones, I had to change the presser foot. At first, I was hesitant to do that because I thought it might be difficult, but I knew that part of the point of this sampler was to get to know my machine. And if I wanted to use my machine to its full advantage, then I needed to be comfortable changing the presser foot. I don't know what I was worried about. It was simple, more than simple, to change out the little foot. What had I been worried about? So then I got to try new patterns that were really pretty. I look forward to being able to make projects that use these decorative stitches.
Besides keeping the line straight and changing the presser foot, what else did this sampler teach me? I learned about reverse and reinforcement stitches. A few times, I forgot to do them at the beginning or end of the line and I see what a difference it can make. And I also learned to make sure I have the number setting correct before I start. I have two lines that are the same stitch because I forgot to change the number on the machine before beginning the next line. Oops. At least it was one of the really pretty ones.
I think I may try to find a frame for this piece because it looks nice as a work of art and it's something that I can be happy to display and also have the memory of creating it each time I look at it. This is definitely not a piece that should just get tossed in a drawer and forgotten about. But for now, since I don't have a frame, I'm posting a picture of the sampler (edged are unfinished as that wasn't the point of this project).


Thursday, December 1, 2011
Thoughts on Future Shop
Today I didn't get any sewing done, but I did pick up a new book and started reading through it. It's a book that teaches sewing techniques through a series of projects, which I thought would be a good way of practicing. I plan to start on the first project tomorrow or over the weekend.
The other thing I've been thinking about is the future shop that I want to open to sell sewn items. It will be a while because I want to make sure I am more polished before I offer items for sale (the pacifier clips will probably be one of the first items I list). I want to focus on two lines of products: items for babies (such as the pacifier clips, bibs, burp cloths, etc.) and items for knitters (project bags, needles cases, etc.).
So one thing I'll need is a shop name. So I started brainstorming for names. My knitting shop is called karendawn knits and spins (yes, I want it to be uncapitalized), so I could just go for karendawn sews. But part of me wants a more creative name.
One of the songs I find myself singing to my son a lot is Do Re Mi. One of the lines is So (Sew), a needle pulling thread. I thought that A Needle Pulling Thread would be a nice name. I checked Etsy. Someone already uses that name. Alas. I tried a couple of others but found them already taken. I decided to try using some puns and now have a list of five possibilities that are still available on Etsy. I'm not sure that any of them are yet the one that says, "yes, this is definitely THE name" so I'm going to keep thinking, but I'm listing them so I can remember what they are.
1. Because I Say Sew
2. Why Sew Serious?
3. Spools Rush In
4. How Unseamly
5. Sew What?
Subscribe to:
Posts (Atom)